Why does a house grow mould after insulation when it never did before?
This is the paradox that shows up most often after a renovation: the house is warmer, the bills are lower, and yet in the first winter a black patch appears in the corner of a window or under the ceiling along an external wall. Owners take it as proof that the insulation "doesn't breathe". The cause is different, and it can be explained in two steps.
The first step is the moisture in the air. An old house with leaky windows ventilated constantly, and the cold outdoor air that warmed up inside was dry. The coldest surface in the room was the old glass, where moisture condensed and ran down. The window worked as a dehumidifier. New windows stop that air exchange, and their glass is warmer than the surrounding wall. Moisture from cooking, showering and breathing stays in the house and its share in the air rises.
The second step is how temperatures are distributed. Insulation warms the wall surface, not every detail. Places where the insulation is missing or interrupted stay relatively cold, and they are now the coldest surfaces in the room. The more humid air cools down next to them and the humidity at the surface rises. Mould does not need visible condensation; a surface that stays damp for long periods is enough. So the thermal bridge did not get worse after the renovation, it simply became the only place the moisture can go.
Two conclusions follow: details must be solved together with the wall area, and ventilation belongs in the same project. The full order of measures is covered in the article on deep renovation; here I focus on the details.
Linear and point bridges: ψ and χ in two sentences
The linear thermal transmittance ψ expresses how much extra heat escapes through one running metre of a junction, for example around a window, along the plinth or under the roof. The point thermal transmittance χ does the same for a single element that pierces the insulation, such as an anchor, a bracket or a beam, and enters the calculation by the number of pieces.
Both matter for the energy balance, but for mould what decides is the surface temperature at the worst point of the detail. A long junction with moderate loss raises the bill; a short, sharp bridge in a corner produces mould. They are not always the same place.
The surface temperature criterion: what fRsi means
Mould risk is assessed through the internal surface temperature factor fRsi. It is a dimensionless number that tells you where, between the outdoor and indoor temperature, the temperature of the coldest point on the surface lies. A value close to one means a surface almost as warm as the room air; a low value means a surface that behaves more like the outside. Its advantage is that it does not depend on the weather: the detail is calculated once and compared with a requirement that the standard derives from indoor humidity and the risk of mould growth.
For the owner, one thing follows. A detail that passed in a dry, leaky house may fail in an airtight house with higher humidity, even though nothing on it has changed. That is why critical details are recalculated during a renovation, not just drawn.
Typical thermal bridges of a Slovak house in renovation
In older masonry houses the same set of places comes up again and again. Continuous external insulation solves some of them on its own; others it does not.
| Thermal bridge | Why it matters | Typical fix | Complexity |
|---|---|---|---|
| Window reveal and window position | Cold frame corner, the most common place for mould after a window replacement | Insulation over the frame, window moved to the insulation plane, a thin high-performance insulant where the frame is narrow | Low when windows are replaced at the same time, high afterwards |
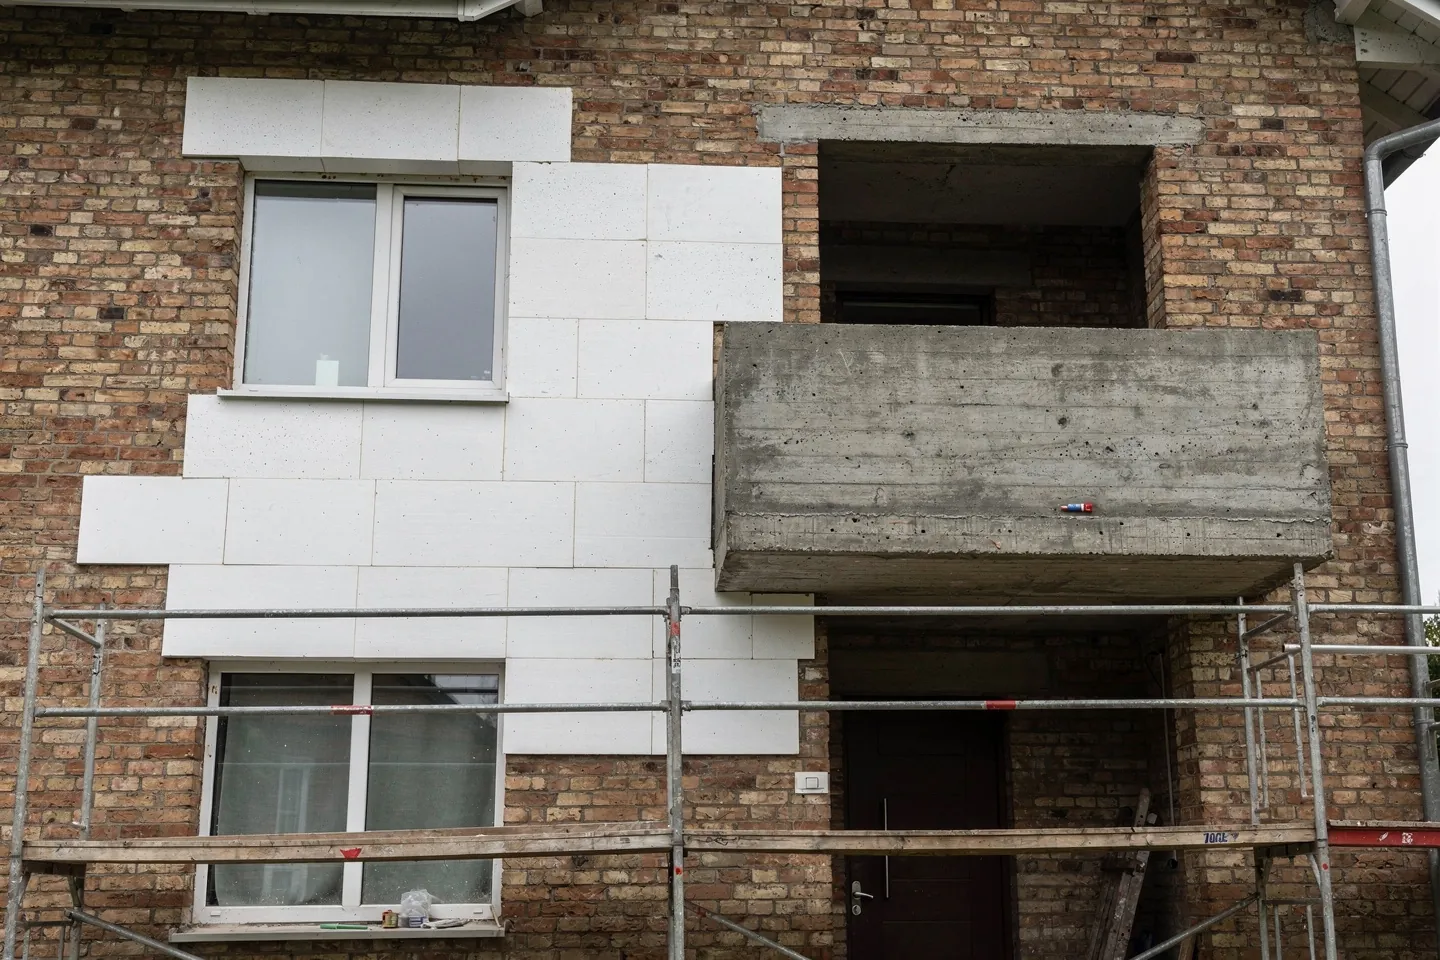
| Cantilevered balcony slab, loggia | The concrete passes through the wall and cools the ceiling and floor of the room | Wrapping on all sides, or cutting it off and building a self-supporting balcony | Wrapping medium, cutting off high, always with a structural engineer |
| Plinth and ground-floor slab | A cold strip along the floor around the whole perimeter | Perimeter insulation below ground, plus insulation from above when floors are replaced | Medium, depending on the excavation |
| Roof/wall junction | A cold corner under the ceiling along the external wall | Facade and roof insulation connected across the wall crown | Low to medium if done together |
| Ring beam and lintels | Concrete and steel conduct heat better than brick | Continuous external insulation, otherwise only partly solvable | Low |
| ETICS anchors | Point bridges, small in energy terms, visible when badly installed | Recessed anchors with a cap, number set by calculation | Low |
| Chimney through the envelope | A cold stack in the attic, air moving through an unused flue | Non-combustible insulation around the stack, decommissioning an unused flue | Medium, with a chimney sweep |
Window reveal and window position
If the windows are replaced together with the facade, the solution is simple and I describe it in detail in the article on replacing windows: the window goes to the insulation plane and the insulation in the jamb runs over the edge of the frame. It is harder with windows replaced a few years ago in their original position, with a narrow frame that an ordinary board will not fit on. Then it helps to remove the reveal plaster and use a thin layer of a higher-performance material, such as an aerogel blanket or a vacuum insulation panel. Throwing out a window that is only a few years old just because of its position is rarely worth it. First measure the humidity of the air and sort out ventilation; that is often enough.
Balcony and loggia
A cantilevered balcony slab is a continuation of the floor slab that runs outside and draws heat away like the fin of a radiator. Wrapping it in insulation on top, underneath and along the edge reduces its effect but does not remove it. The top layer runs into the balcony door threshold, so a thin vacuum panel is used there or the door is set higher. The full solution is to cut the slab off and replace it with a balcony on its own columns or with brackets anchored through a structural thermal break. For a small, unused balcony on the north side, cutting it off often turns out more sensible than it seems. A loggia is more complicated because its ceiling, floor and side walls are all cold surfaces connected to the house; its inner surfaces are insulated. Removing a balcony or adding a new one changes the appearance of the building, so check the procedure with the building office.
Plinth and ground-floor slab
Most older houses have an uninsulated ground floor. After insulation the wall is warm and the floor is not, and their junction forms a cold strip at floor level. Perimeter insulation taken below ground moves this strip lower and makes it smaller. Digging deep around the whole house makes sense where there is a lived-in room behind the wall; with an unheated basement, the ceiling above it is usually insulated instead. If the floors are being replaced, insulation from above combined with perimeter insulation outside is the best combination.
Wall plate, ring beam and lintels
Under the roof the facade, the roof structure and the ceiling meet, and every contractor ends their work here. ETICS often stops below the rafters because the rafter ends get in the way, and the attic floor insulation does not reach the outer edge of the wall plate. The result is a cold corner under the ceiling. The fix is to fill the space between the rafters above the masonry with insulation and connect it to the ceiling insulation so that both layers cross the wall crown without a gap. The ring beam and lintels are solved by themselves with continuous external insulation, because the insulant covers them. The problem remains with internal insulation and when only some walls are insulated.
Anchors and chimney
ETICS anchors are a typical point bridge. With recessed anchors and an insulating cap their effect is small and the designer accounts for it. A visible grid on the facade is a cosmetic matter, not a reason to redo the work. A chimney passing through a cold attic, or an unused flue with air moving through it, cools the wall it sits against. Only non-combustible insulation is used around a chimney stack, and for a chimney in use the chimney sweep decides. An unused chimney is worth decommissioning and removing above the roof or sealing; if it also served as ventilation, something has to replace it.
What you see on the wall and what it means
Where the mould appears usually gives away the cause. Before you reach for an anti-mould paint, compare it with this table.
| What you see | Likely cause | What to check |
|---|---|---|
| Mould in the window corner or on the reveal | Uninsulated reveal, window outside the insulation plane, high humidity | Thermal imaging from inside, indoor air humidity |
| Mould in the upper corner along an external wall | Roof/wall junction, wall plate, ring beam | Insulation over the wall crown, seen from the attic |
| A dark strip along the floor of an external wall | Plinth, uninsulated floor | Depth of perimeter insulation, floor build-up |
| Damp ceiling or floor by the balcony door | Cantilevered balcony slab | Whether the slab is wrapped on all sides |
| Mould behind a wardrobe on an external wall | Cold surface with no air movement | Move the furniture away, measure the surface |
| Condensation on the glass of every window | Humidity too high, not a thermal bridge | Ventilation, extraction in kitchen and bathroom |
| Regular dots on the facade after a frost | ETICS anchors | Usually cosmetic only |
Thermal imaging: when and how to order it
A thermal camera shows surface temperature, not heat flow, and it is meaningful only when there is a sufficient difference between inside and outside. Imaging therefore belongs in the heating season, ideally on a cold morning before sunrise, when the sun has not been on the facade for several hours beforehand, there is no strong wind and no rain. The house should be heated evenly since at least the previous day.
For diagnosing mould, the view from inside is more useful because it shows the coldest spots where the risk arises. External images reveal missing insulation well, but on a ventilated facade they say almost nothing. Shiny surfaces such as glass and metal reflect their surroundings and mislead. Two surveys make sense: one before the renovation as input for the design, and one in the first heating season after it, while defects can still be claimed.
How the energy assessment and Obnov Dom treat thermal bridges
Both the energy performance certificate and the project energy assessment calculate the heat loss of the house including thermal bridges. This is done either in detail, from calculated ψ values for individual junctions, or with a simplified surcharge on whole constructions. The surcharge is enough for the balance, but it says nothing about where mould is a risk. If you want certainty at the balcony, the reveal or the plinth, ask the designer to calculate those details.
The Obnov Dom programme deals with thermal bridges only marginally in its calls. The specific rules, for example whether insulation extending beyond the heat-loss area to limit thermal bridges is accepted, are always set by the wording of the current call, so check them there; the programme mechanism is described in the Obnov Dom subsidy guide. The saving on which the support is graded is, however, calculated from the assessment, so well-solved details show up in it.